Picture this: you’re sitting on your porch on a sunny Saturday, coffee in hand, and the house is quietly humming with clean energy. That feeling of watching the sun do the heavy lifting is what pulls many homeowners toward solar panels for home use.
But the idea of adding panels can feel overwhelming, right? Maybe you’ve heard about pricey installations, confusing rebates, or worries that the panels will look like a giant metal net over your roof. In our experience at Pep Energy, we’ve helped dozens of families cut through that noise and see the real benefits.
So, why consider solar panels for home now? First, electricity rates have been climbing faster than most of us expected, and a well‑designed system can lock in lower costs for years. Second, the environmental payoff is tangible – you’re reducing carbon emissions without sacrificing comfort.
Think about the moment when your utility bill finally drops below the usual amount. It’s a mix of surprise and relief, and it often sparks conversations with neighbors about how they can do the same. That ripple effect is something we love to see.
Of course, there are choices to make: how many panels you need, whether a roof‑mount or ground‑mount works best, and if financing or a lease fits your budget. What we’ve found works best is starting with a simple site assessment – a quick walk‑through that tells you sunlight exposure, roof condition, and potential savings.
And here’s a little tip: don’t let the jargon scare you. Terms like “kW‑peak” or “net metering” sound technical, but they’re just ways to measure how much sunshine you can capture and how you get credit for excess power. Once you decode them, the decision becomes a lot clearer.
Ready to take the first step? Grab a notebook, jot down your current monthly electricity cost, and imagine cutting that number in half. It’s not a pipe dream – it’s a realistic goal for many homeowners who partner with knowledgeable installers.
In the next sections we’ll walk through selecting the right panels, navigating incentives, and keeping your system humming for years. Let’s dive in and turn that sunny porch vision into a daily reality.
TL;DR
If you’re ready to turn your sunny porch into a real savings machine, the TL;DR is: a modest site assessment tells you how many Solar panels for home you need, what financing fits, and how quickly you’ll see bills shrink.
We’ve helped dozens of homeowners cut electricity costs in half—let’s make it happen.
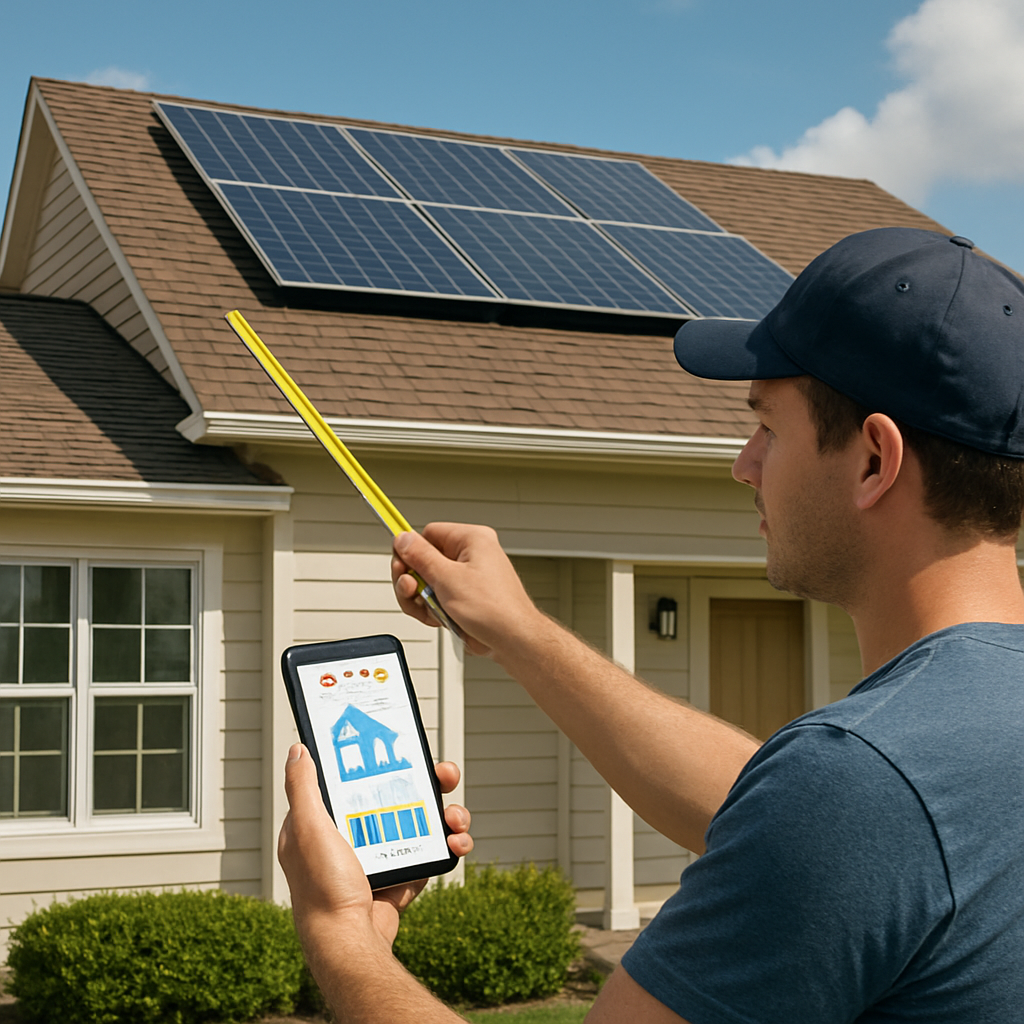
Step 1: Assess Your Home’s Solar Potential
Okay, you’ve decided to see if solar panels for home are a realistic option. First thing? Take a good look at where the sun actually hits your roof.
It sounds simple, but there are a few details that can make or break the estimate. Let’s walk through the checklist together.
Check Sunlight Hours
Grab a notebook (or your phone) and note the direction your roof faces – north, south, east, or west. In the Northern Hemisphere, a south‑facing roof usually gets the most direct sun, while east and west get good morning or afternoon light.
Next, count the sunny hours you see on a typical day in summer versus winter. A quick way is to stand outside at noon for a week and jot down whether the sun shines directly on the roof or is blocked by a tree, chimney, or neighbor’s house.
Tip: If you’re not comfortable climbing a ladder, you can use a free online solar map – just type your address into a site like Google Maps and look at the satellite view.
Inspect Roof Condition
Are there missing shingles? Any water stains in the attic? If the roof needs repairs, it’s cheaper to fix them now rather than after the solar installation.
And don’t forget the age of the roof. Most solar contracts last 25‑30 years, so a roof that’s 10‑15 years old is usually fine, but anything older might need a replacement.
Measure Available Area
Measure the length and width of the unobstructed portion of the roof. Multiply the two numbers to get square feet, then divide by the typical panel size (about 17 sq ft per panel). That gives you a rough panel count.
But keep in mind shading from vents, dormers, or skylights will reduce usable space. A small shade‑tree can cut the output of an entire row of panels.
Here’s a quick checklist you can print:
- Roof orientation (N/S/E/W)
- Average daily sun hours (summer/winter)
- Roof age & condition
- Clear, unshaded area in sq ft
- Any upcoming roof work?
Once you have those numbers, you can plug them into a simple calculator to estimate potential kilowatt‑hours per year. In our experience, most homeowners end up with a system between 5 kW and 10 kW – enough to offset 50‑80 % of a typical electric bill.
Local Factors to Consider
Some neighborhoods have HOA rules about visible equipment. Others might have specific permitting requirements. A quick call to your city’s building department can save you weeks of back‑and‑forth.
And if you live in a historic district, you might need to match the look of your roof. That’s where a partner like Monroe Plantation Shutter Pros can help you blend solar panels with custom shading solutions that keep the aesthetic intact.
Now, let’s bring it all together with a visual aid.
After you watch the short video, you’ll see a step‑by‑step walk‑through of a roof survey, from measuring the pitch to checking for shading.

With that visual in mind, the next move is to schedule a professional site assessment. It’s usually free, takes about an hour, and gives you a precise layout, estimated production, and a ballpark cost.
When the assessor arrives, ask them to point out any hidden obstacles – like hidden rafters or wiring – that could affect panel placement. The more details you gather now, the smoother the installation will be later.
Bottom line: a solid home assessment is the foundation of a successful solar project. Spend a few hours today, and you’ll avoid surprise expenses down the road.
Step 2: Calculate Energy Needs and Savings
Alright, you’ve measured your roof, you’ve spotted the shade, and now you’re staring at a blank spreadsheet. It feels a bit like trying to guess how many pizza slices you’ll need for a party – you could wing it, but why not get a reliable count?
Gather Your Baseline Data
First, pull your last 12 months of electricity bills. Add up the total kilowatt‑hours (kWh) you used – that number is your household’s annual energy appetite. If you don’t have a full year, take the average of the months you do have and multiply by 12.
For example, the average U.S. home burns about 10,791 kWh a year (roughly 900 kWh per month). If your bill shows 1,200 kWh per month, you’re on the high side, probably because of central AC or a pool pump.
Convert Usage Into System Size
Next, decide how much of that usage you want to offset. Most homeowners aim for 80‑100 % coverage. Here’s the quick formula:
System size (kW) = Annual kWh ÷ (Production ratio × 1,000)
The production ratio captures how many kWh a 1‑kW system will actually generate in your zip code. It usually ranges from 1.1 (cloudier regions) to 1.7 (sun‑belt). Let’s walk through two real‑world scenarios.
Example 1: Sunny California Home
Annual usage: 12,000 kWh.
Production ratio: 1.5.
System size = 12,000 ÷ (1.5 × 1,000) ≈ 8 kW.
At 450 W per panel, you’d need roughly 18 panels (8,000 W ÷ 450 W ≈ 18). That’s a tidy fit on a typical 1,500‑sq‑ft roof.
Example 2: Cloudier Massachusetts Home
Annual usage: 12,000 kWh.
Production ratio: 1.2.
System size = 12,000 ÷ (1.2 × 1,000) ≈ 10 kW.
With the same 450‑W panels, you’re looking at about 22 panels. You might need a slightly larger roof area or consider higher‑efficiency panels to keep the footprint reasonable.
Factor in Roof Realities
Remember that not every square foot is usable. Subtract space lost to chimneys, skylights, and any permanent shading. A good rule of thumb is to reserve 10‑15 % of the roof for clearance. If you have 1,800 sq ft of usable space, you can comfortably fit around 20 panels of the standard 17‑sq‑ft size.
When the numbers don’t line up, you have options: trim trees, shift panels to a less‑shaded section, or go for a ground‑mount if your yard allows. In some cases, a small roof‑reinforcement is needed – that’s where a trusted contractor like LGFMH Construction can help you patch up any weak spots before the solar crew arrives.
Run the Savings Calculator
Now that you know the system size, plug it into a solar savings calculator. Most tools ask for:
- Your utility’s $/kWh rate (average U.S. rate is about $0.17/kWh).
- Any local net‑metering or feed‑in tariff.
- Estimated system cost (average $2.53 per watt).
Let’s say your 8‑kW system costs $20,240 (8,000 W × $2.53). With a $0.17/kWh rate, you’d avoid roughly $2,040 in electricity each year. Over 25 years, that’s $51,000 in savings – not counting the extra value from any state rebates or tax credits.
If you’re budgeting tightly, you might look at financing options or a solar lease. The key is to compare the total out‑of‑pocket cost against the projected savings, not just the upfront price.
Document Your Findings
Grab a notebook (or a notes app) and jot down:
- Total annual kWh usage.
- Desired offset percentage.
- Calculated system size in kW.
- Number of panels and roof‑fit estimate.
- Projected annual savings and pay‑back period.
Having these figures at hand makes it easy to request a detailed quote from a solar installer.
And if you’re wondering about the cost of preparing your roof for panels – whether it’s a simple repair or a full replacement – the guide from Awesim breaks down the budgeting basics, so you won’t be caught off guard.
Bottom line: calculating energy needs isn’t rocket science, but doing it methodically saves you from over‑buying or under‑buying. Once you have those numbers, the next step (Step 3) is picking the right panels – and we’ll walk you through that in a minute.
Step 3: Compare Solar Panel Types and Technologies
Now that you’ve got a rough system size, the next puzzle piece is deciding which panels actually sit on your roof.
What’s on the market?
At the moment most residential installs fall into three buckets: monocrystalline silicon, polycrystalline silicon, and the newer perovskite‑based cells. Each has its own trade‑off between efficiency, price, and look.
Monocrystalline – the sleek, high‑efficiency option
These panels are made from a single silicon crystal, which lets electrons flow more freely. The result? Efficiencies that can top 23 % and a deep‑black appearance that blends nicely with dark roofs. The downside is a higher price tag per watt.
In our experience, homeowners with limited roof space – think of a modest‑sized bungalow or a sloped attic – get the most bang for their buck with monocrystalline. Fewer panels mean less mounting hardware and a cleaner visual profile.
Read more about the efficiency advantage on EnergySage’s comparison page.
Polycrystalline – the budget‑friendly, blue‑hued sibling
Polycrystalline panels are formed by melting many silicon fragments together. They’re usually a shade of blue and sit a few points lower on the efficiency scale, often under 20 %.
Because the manufacturing process is simpler, the upfront cost per panel drops noticeably. If your roof is generous – say you have a sprawling ranch‑style home with a south‑facing roof that can host 25‑plus panels – polycrystalline can still meet your energy goals without breaking the bank.
Perovskite – the experimental contender
Perovskite cells use a thin‑film of metal‑halide crystals to capture light. They’ve leapt from single‑digit efficiencies a decade ago to over 26 % in labs today, and they can be stacked on top of silicon to squeeze out even more power.
The technology is still in the research phase, and large‑scale commercial modules aren’t widely available yet. That said, the Department of Energy is pouring resources into speeding up perovskite commercialization, so keep an eye on it if you’re planning a new build or a major remodel.
Learn more about the science behind perovskite cells on the DOE website.
How to choose the right panel for your home
Start with three quick questions:
- How many roof area do you actually have after accounting for chimneys, skylights, and shading?
- What’s your budget per watt?
- Do you care more about looks or upfront cost?
If the answer to #1 is “tight” and #2 leans toward “I can spend a bit more,” monocrystalline is the safe bet. If #1 is “plenty” and #2 is “keep it cheap,” polycrystalline makes sense. And if you’re willing to wait for next‑generation tech and your project timeline is flexible, you might earmark space for future perovskite modules.
Quick comparison table
| Panel Type | Typical Efficiency | Cost per Watt | Key Considerations |
|---|---|---|---|
| Monocrystalline | 20‑23 % | Higher | Best for limited space; sleek black look; higher ROI on small roofs. |
| Polycrystalline | 15‑19 % | Lower | Great for large, unobstructed roofs; blue hue; lower upfront cost. |
| Perovskite (emerging) | 25‑34 % (lab) | Not yet commercial | Potential for tandem cells; still in R&D watch for future releases. |
Bottom line: match the panel’s efficiency to the square footage you can actually use, and let your budget decide whether you go premium now or wait for the next wave of tech.
A couple of extra tips to keep in mind: first, ask your installer for a performance guarantee that reflects the panel’s temperature coefficient – monocrystalline usually holds up better on hot roofs. Second, consider pairing your chosen panels with a battery storage system if you want backup power during outages; the same efficiency differences will affect how quickly your battery charges.
When you’re ready to request quotes, let the installer know which type you prefer – they’ll adjust the layout, mounting hardware, and overall system size accordingly.
Step 4: Choose a Reputable Installer and Financing Options
You’ve measured the roof, picked the panels you like, and run the rough numbers. Now the real work begins: finding someone who’ll design, permit, and install the system without surprises — and choosing a financing path that actually saves you money.
Why the installer matters
Think of the installer as the person building your savings engine. A great crew maximizes production, handles permits, and helps you claim incentives. A poor one can cost you months of lost output and expensive repairs.
So, what should you do next?
Step-by-step vetting checklist (do this for every quote)
1) Verify credentials. Ask for contractor license, business insurance, and NABCEP certification where available. These are basic but essential checks.
2) Ask for three recent references. Call them. Ask what the actual energy production looked like after 6–12 months.
3) Request a written scope and timeline. It should list panels, inverters, racking, battery (if any), warranties, and who pulls permits.
4) Compare performance guarantees and workmanship warranties. Panels often come with 25-year output warranties; installers should back their work for at least 5–10 years.
5) Spot red flags: pushy high‑pressure sales, unverifiable savings claims, or contracts that lock you into odd terms. If something feels off, walk away.
Need a practical test? Ask every installer the same three questions: how will you handle shading, what happens if the roof needs work, and how do you calculate expected annual kWh? The answers tell you a lot.
Real-world examples
Example A: A 2,000‑sq‑ft suburban home. Two installers bid. Installer 1 offers cheaper panels but no performance guarantee and a vague timeline. Installer 2 provides a site-specific production estimate, a 10-year labor warranty, and references from three neighbors. We’d pick Installer 2 — fewer surprises and better long-term value.
Example B: You want a battery backup. Pick an installer with proven battery integrations and references for outage scenarios. Don’t assume any installer can wire a safe battery system; ask for those case studies.
Financing options explained — short and practical
Cash purchase: Highest upfront cost, biggest lifetime savings, and you qualify for federal tax credits when available.
Solar loan: Low or no down payment, you own the system, and monthly payments can be smaller than your old electric bill. Many loans let you claim tax credits too.
Lease/PPA: Low or no upfront cost, but you don’t own the system and you typically can’t claim tax incentives. Good if you want immediate bill predictability without ownership headaches.
Which fits you? If you plan to own the home longer than the loan term, buying (cash or loan) usually gives the best ROI. If you might move soon, a lease or PPA reduces short-term risk.
How to compare offers — an actionable scorecard
Score each proposal on these five factors (1–5): expected annual production, total installed cost, warranties, installer reputation, flexibility for batteries/roof work. Add scores and compare. Don’t pick solely on price.
One more question: who helps you claim incentives and net metering? A good installer guides the paperwork.
If you want a quick, authoritative reference on installer selection and financing basics, see the U.S. Department of Energy’s Homeowner’s Guide to Solar for practical resources and tools. For a focused look at financing options used by homeowners and community programs, the DC Office of Energy and Environment’s Solar Financing guide is a useful deep dive.

Step 5: Installation Process and Maintenance Tips
Alright, you’ve picked your panels, signed the paperwork, and now you’re wondering what actually happens after you hand over a check. Trust me, the process isn’t a mystery – it’s a handful of predictable steps that, if you know them, feel a lot less like a gamble.
Week 1–2: The engineer’s swing by
Once the contract is signed, a licensed electrical engineer (or a senior tech, depending on local rules) drops in for a quick site visit. They’ll double‑check your roof’s structural integrity, peek at your electrical panel, and confirm the shade analysis you did yourself.
Ask them to point out any hidden obstacles – like a vent that needs a custom flash or a roof patch that should be fixed before the racking goes up. In our experience, catching those quirks early saves you a weekend of delays.
Week 3–4: Permits, paperwork, and the “order” stage
While the engineer is doing their thing, your installer files the building permits and any local incentive applications. This is the part where paperwork can feel endless, but a good installer will keep you in the loop and let you know when a city inspector is scheduled.
Need a quick reference on what to expect? The EnergySage installation timeline guide breaks down each milestone in plain language.
Week 5–7: The actual install – three days, give or take
Most residential systems are up in one to three days. Day 1 is all about roof prep: the crew clears any debris, installs the mounting rails, and makes sure everything is watertight. They’ll even snap a quick photo of the roof after the rails are in place so you can see the work without climbing up yourself.
Day 2 is the fun part – the panels themselves. They’re lifted onto the rails, bolted down, and wired together. The electrician then runs conduit from the array to your home’s main breaker box.
Day 3 usually means the inverter is hooked up, the system is inspected by the local authority, and the utility company does its final interconnection test. When you hear “you’re good to go,” that’s the moment you’ve been waiting for.
Quick checklist for installation day
- Clear the driveway and any walkways around the house.
- Make sure the electrical panel is accessible – no stacked boxes or toys in the basement.
- Have a water hose handy for a quick rinse if dust settles on the panels after the crew leaves.
And don’t forget to ask the installer for a copy of the as‑built plan – it shows exactly where each panel sits, which is handy for future maintenance or insurance claims.
After the lights come on: Maintenance basics
Solar panels are low‑maintenance, but a little love goes a long way. The biggest enemy is dust, pollen, and bird droppings that can shave a few percent off your production each year.
For a simple, safe routine, use a soft‑bristled brush or a garden hose with a gentle spray. Avoid pressure washers – they can damage the tempered glass.
Need a step‑by‑step cleaning routine? Check out these solar panel cleaning tips. They walk you through everything from when to clean (usually twice a year in most climates) to what mild soap you can safely use.
Besides cleaning, keep an eye on the inverter’s display or the monitoring app your installer set up. If the daily production dips more than 10 % compared to the same month last year, it’s worth a quick visual inspection – maybe a new shade has appeared or a loose connection needs tightening.
Seasonal check‑ups
Spring is a great time to pull the attic ladder, look at the roof deck, and make sure the flashing around chimneys and vents is still sealed. Winter storms can loosen bolts, so a quick visual once a year (or after a big wind event) can prevent costly leaks.
And if you’ve added a battery, remember the battery’s health dashboard. Most modern systems will alert you if temperature or charge cycles go out of spec.
Bottom line: the installation isn’t a black box, and a few minutes of regular maintenance keep your solar panels humming for decades. You’ve already done the heavy lifting by choosing the right system – now a little routine care ensures the payoff keeps growing year after year.
Conclusion
We’ve walked through everything from sizing your roof to picking the right panel type, and now you’ve got a clear picture of what “Solar panels for home” really mean for your wallet and the planet.
Think back to that moment on the porch, coffee in hand, watching the sun do the heavy lifting. That feeling isn’t just a nice thought—it’s the payoff of a few minutes of planning and a bit of routine care.
In our experience, homeowners who stick to a twice‑year cleaning schedule and keep an eye on inverter stats see up to 5 % more energy each year. It’s a tiny habit that adds up.
So, what’s the next step? Grab that notebook, jot down your roof’s usable space, and reach out to a trusted installer who can turn those numbers into a solid proposal.
Remember, the system isn’t a “set‑and‑forget” black box; a quick visual check after a big storm or a seasonal seal‑check can save you costly repairs later.
Ready to lock in lower bills and cleaner energy? A short call with Pep Energy can help you map out financing, lease options, or a straight purchase—whatever fits your timeline.
Bottom line: a little upfront effort and ongoing care keep your solar investment humming for decades, turning that sunny porch vision into everyday reality.
FAQ
What are the main benefits of installing solar panels for home use?
When you put solar panels for home on your roof, you start cutting your electric bill right away. In most states the panels can shave 30‑70 % off the monthly charge, and the savings keep growing as utility rates rise. Beyond the money, you’re generating clean power that reduces carbon emissions, which helps protect the air you breathe and can boost your property’s resale value. And the peace of mind of watching the sun do the work for you is a genuine bonus.
How long does it take to see a return on investment?
Most homeowners see a positive cash flow within 6‑9 years, depending on system size, local electricity rates, and any rebates you capture. After the pay‑back period the panels keep producing energy at little to no cost, so every kilowatt‑hour afterward is essentially free. If you’re financing, compare the loan term to the expected pay‑back; a shorter loan often means you start reaping pure profit sooner.
Do I need a big roof to make solar panels for home work?
Not necessarily. Even a modest roof can host a system that covers a large slice of your usage, especially if you choose high‑efficiency monocrystalline panels. The key is to maximize usable, sun‑exposed space and avoid heavy shading. In many cases a 5‑kW system fits on a typical 1,500‑sq‑ft roof, which is enough to offset most of a family’s electricity demand.
What maintenance does a residential solar system require?
Solar panels are low‑maintenance, but a quick visual check twice a year helps keep performance up. Clear away leaves, dust, or bird droppings with a soft brush or a gentle hose spray—avoid pressure washers. Monitor the inverter’s display or app; a dip of more than 10 % compared to the same month last year signals a possible shade issue or loose connection that you can address promptly.
Can I combine solar panels for home with a battery backup?
Absolutely. Adding a battery lets you store excess daytime energy for evenings or outages, giving you greater independence from the grid. Most modern inverters integrate seamlessly with lithium‑ion batteries, and you can size the storage to match your typical night‑time load. Keep in mind the upfront cost, but the added resilience often pays off during storms or peak‑price periods.
What financing options are available for homeowners?
You can buy the system outright, take out a solar loan, or opt for a lease/PPA. Cash purchase offers the biggest long‑term savings and lets you claim federal tax credits. Loans spread the cost over 5‑15 years while you still own the panels and enjoy the incentives. Leases require little or no money down, but you won’t own the system or receive tax benefits, making them best for short‑term homeowners.
Are there any rebates or incentives I might be missing?
Many states and utilities still offer cash rebates, performance‑based incentives, or property‑tax exemptions for solar installations. The federal Investment Tax Credit (ITC) currently covers a significant portion of the system cost, and it’s set to step down in future years, so acting sooner can lock in a higher credit. Check your local utility’s website or talk to a trusted installer to make sure you capture every available discount.


